
Sashiko Adventures
I love stitching and hand embroidery! My parents showed me some handstitching techniques while growing up. While visiting and caring for my mother last summer, I had the opportunity to take a mini-workshop from Virginia stitcher, Julie Booth. I had previously taken a trapunto class from her.
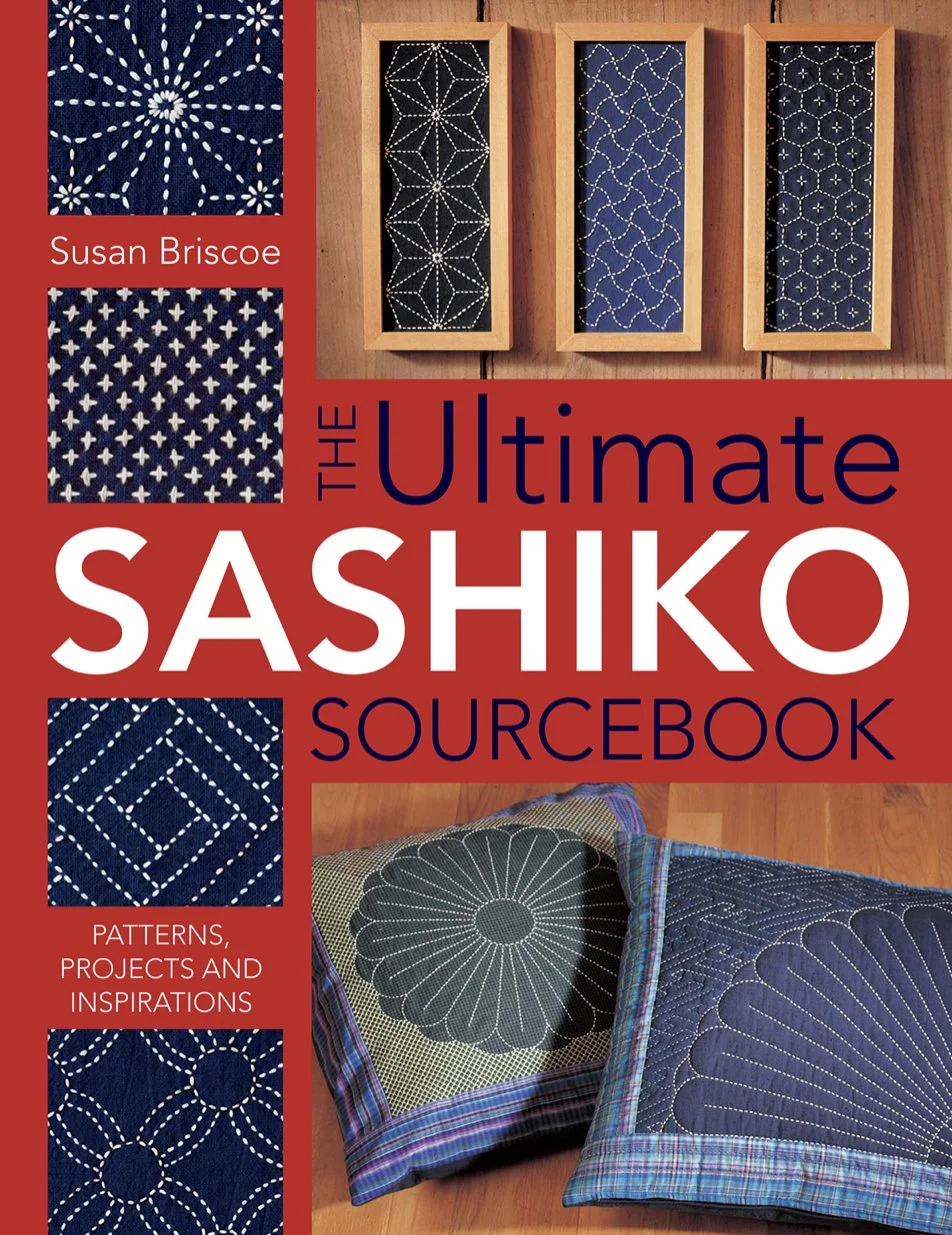
I followed up with purchasing the following book, The Ultimate Sashiko Sourcebook, which opened my world up to the art of “Sashiko” or “little stab” in Japanese. Sashiko can be simple or create very intricate designs with the running stitch. My favorite Sashiko tools are the hera bone tool for initial marking, a Tulip Sashiko big eye needle and 10/2 perle cotton yarn. History indicates that Sashiko was often used in mending clothing at a time when fibers were handspun and cloth was handwoven and hand-dyed. Suitable fabrics were linen, hemp, and ramie. Patterned cotton fabrics later became used for kasuri (ikat) and even Shibori. As I read about it’s history, I thought why not use my own handwoven fabric samples for fabric collage and Sashiko stitching?
First Fabric Collage with Sashiko
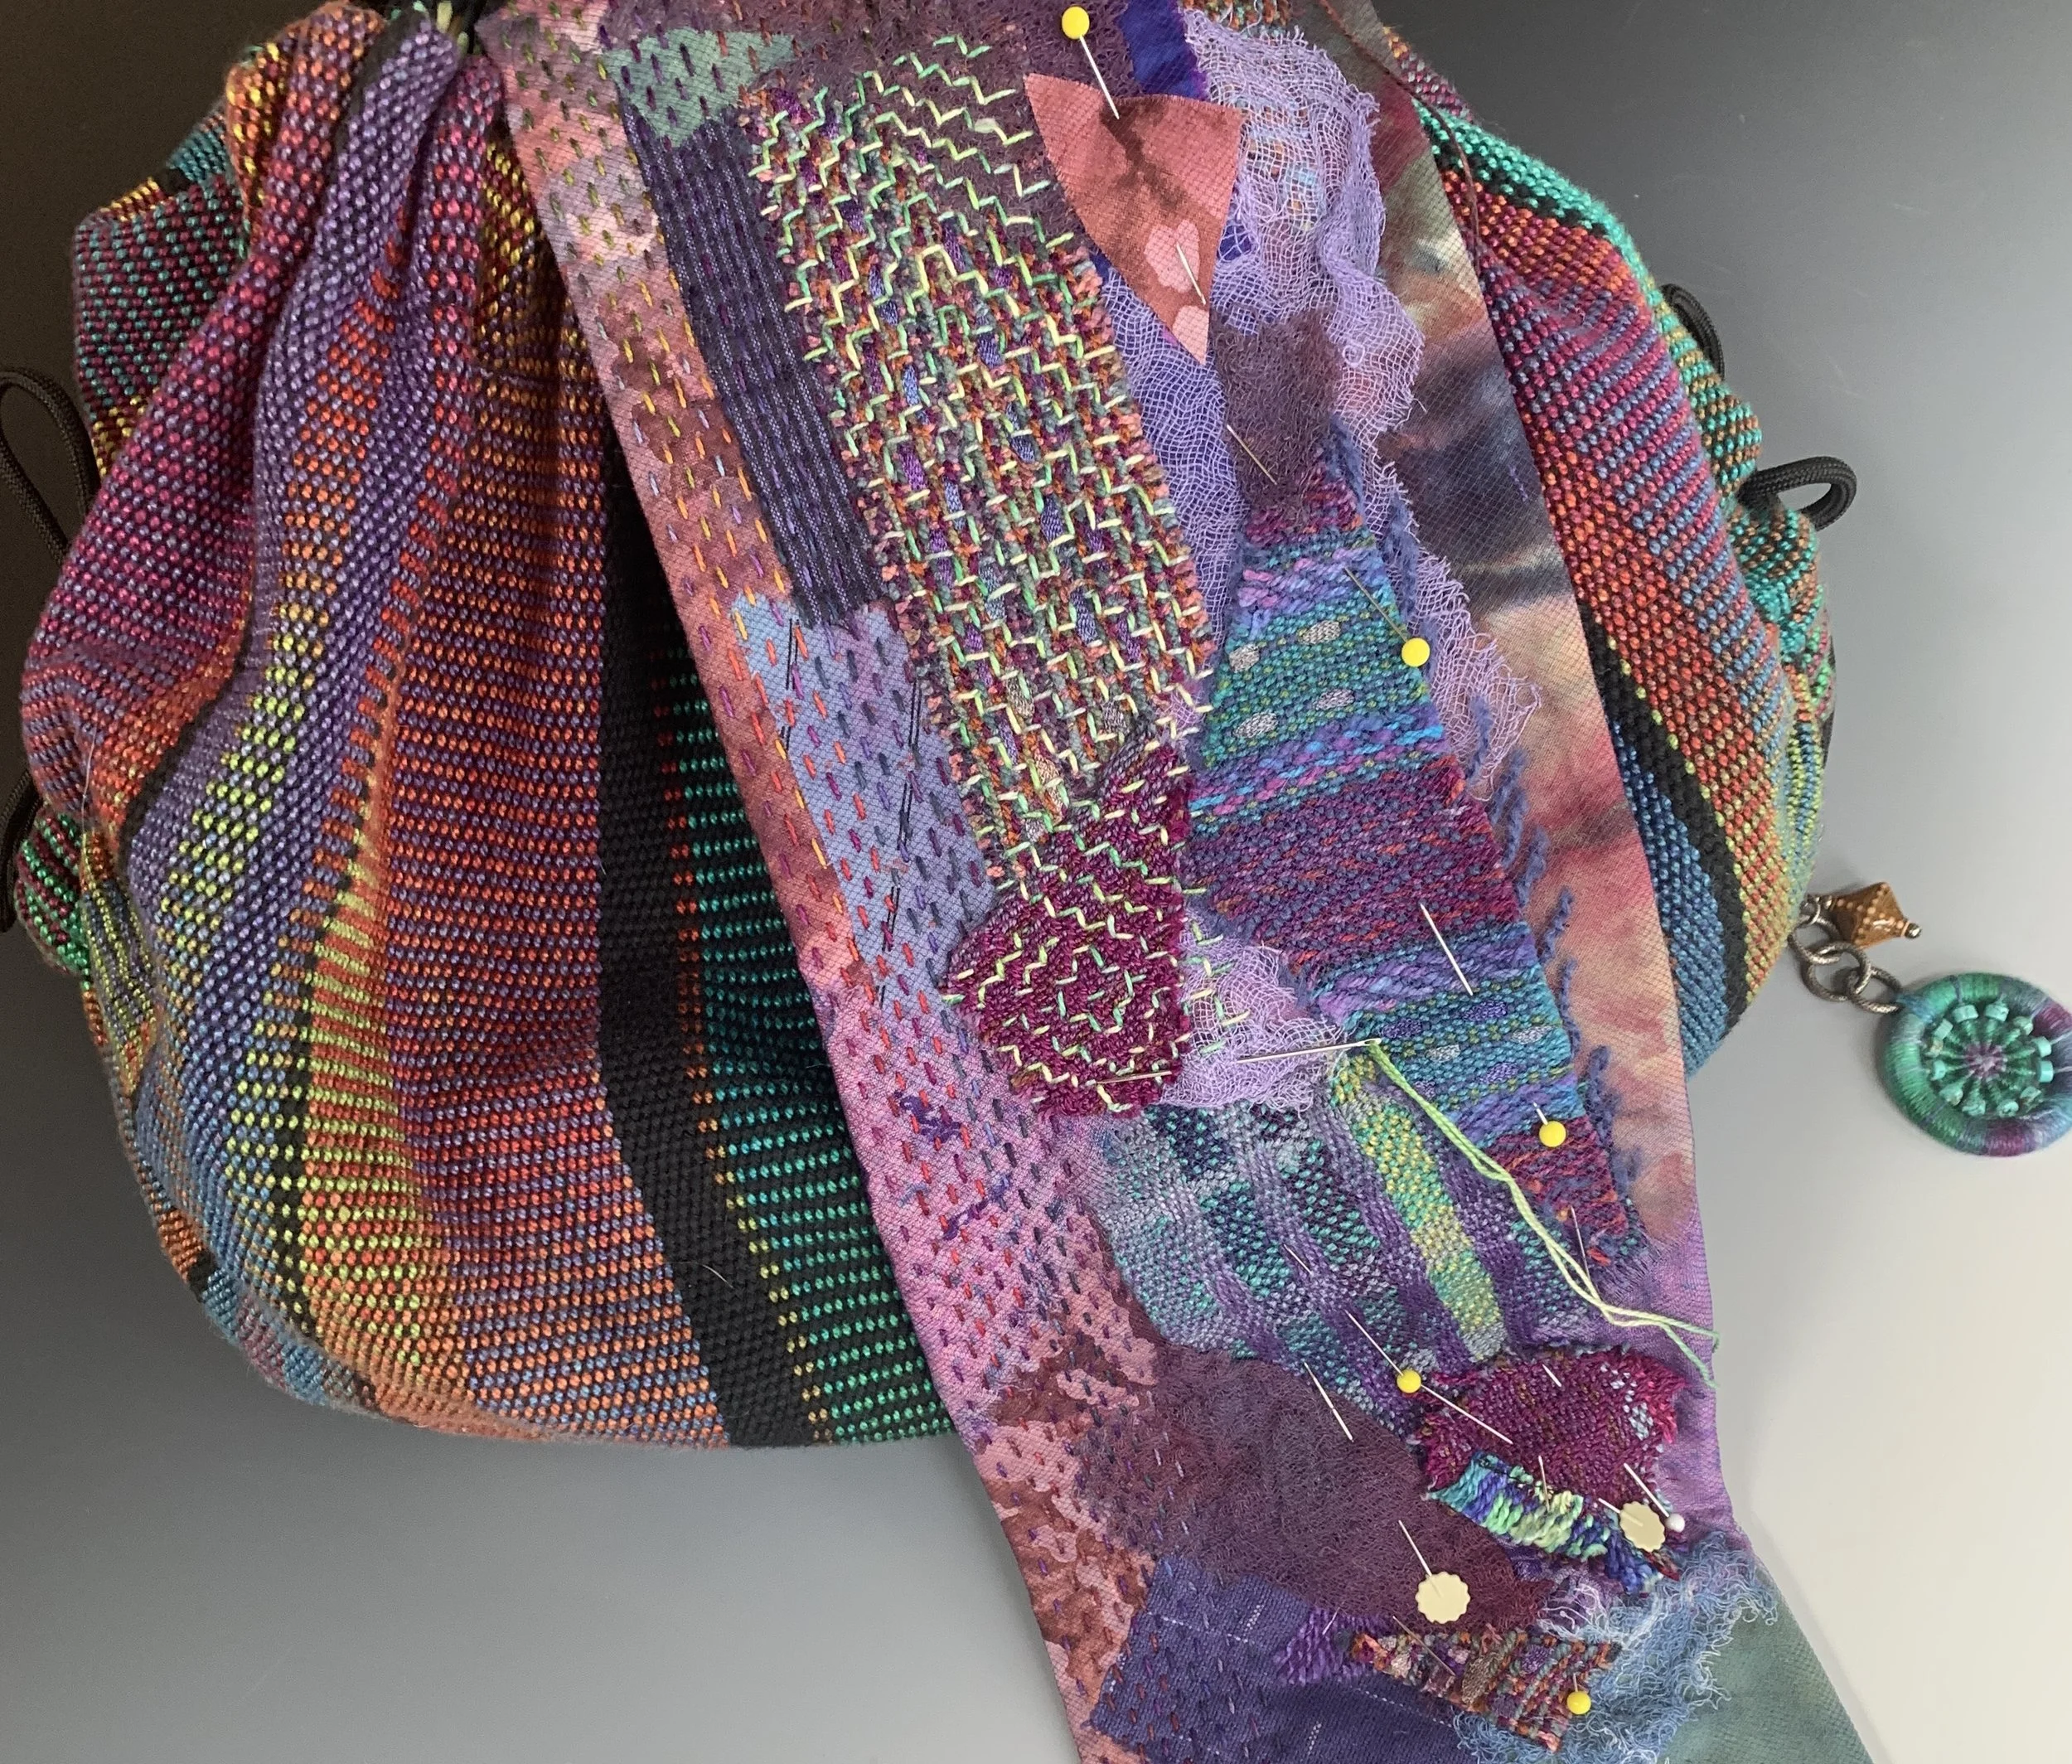
Tulle netting makes for an excellent collaging fabric as an overlay to protect raw edge fabrics. Pins are used to hold the fabrics in place on a felt base until the layers can be stitched together using 10/2 perle cotton thread. I loved that I was able to use authentic boro cloth (left) on the left from my personal fabric collection. Cheesecloth! I use it in felting and also ice-dye it for an airy, open look.
The hera bone marker can be used to mark the first stitch line. Stitches should be even and I need some practice making tiny running stitches.
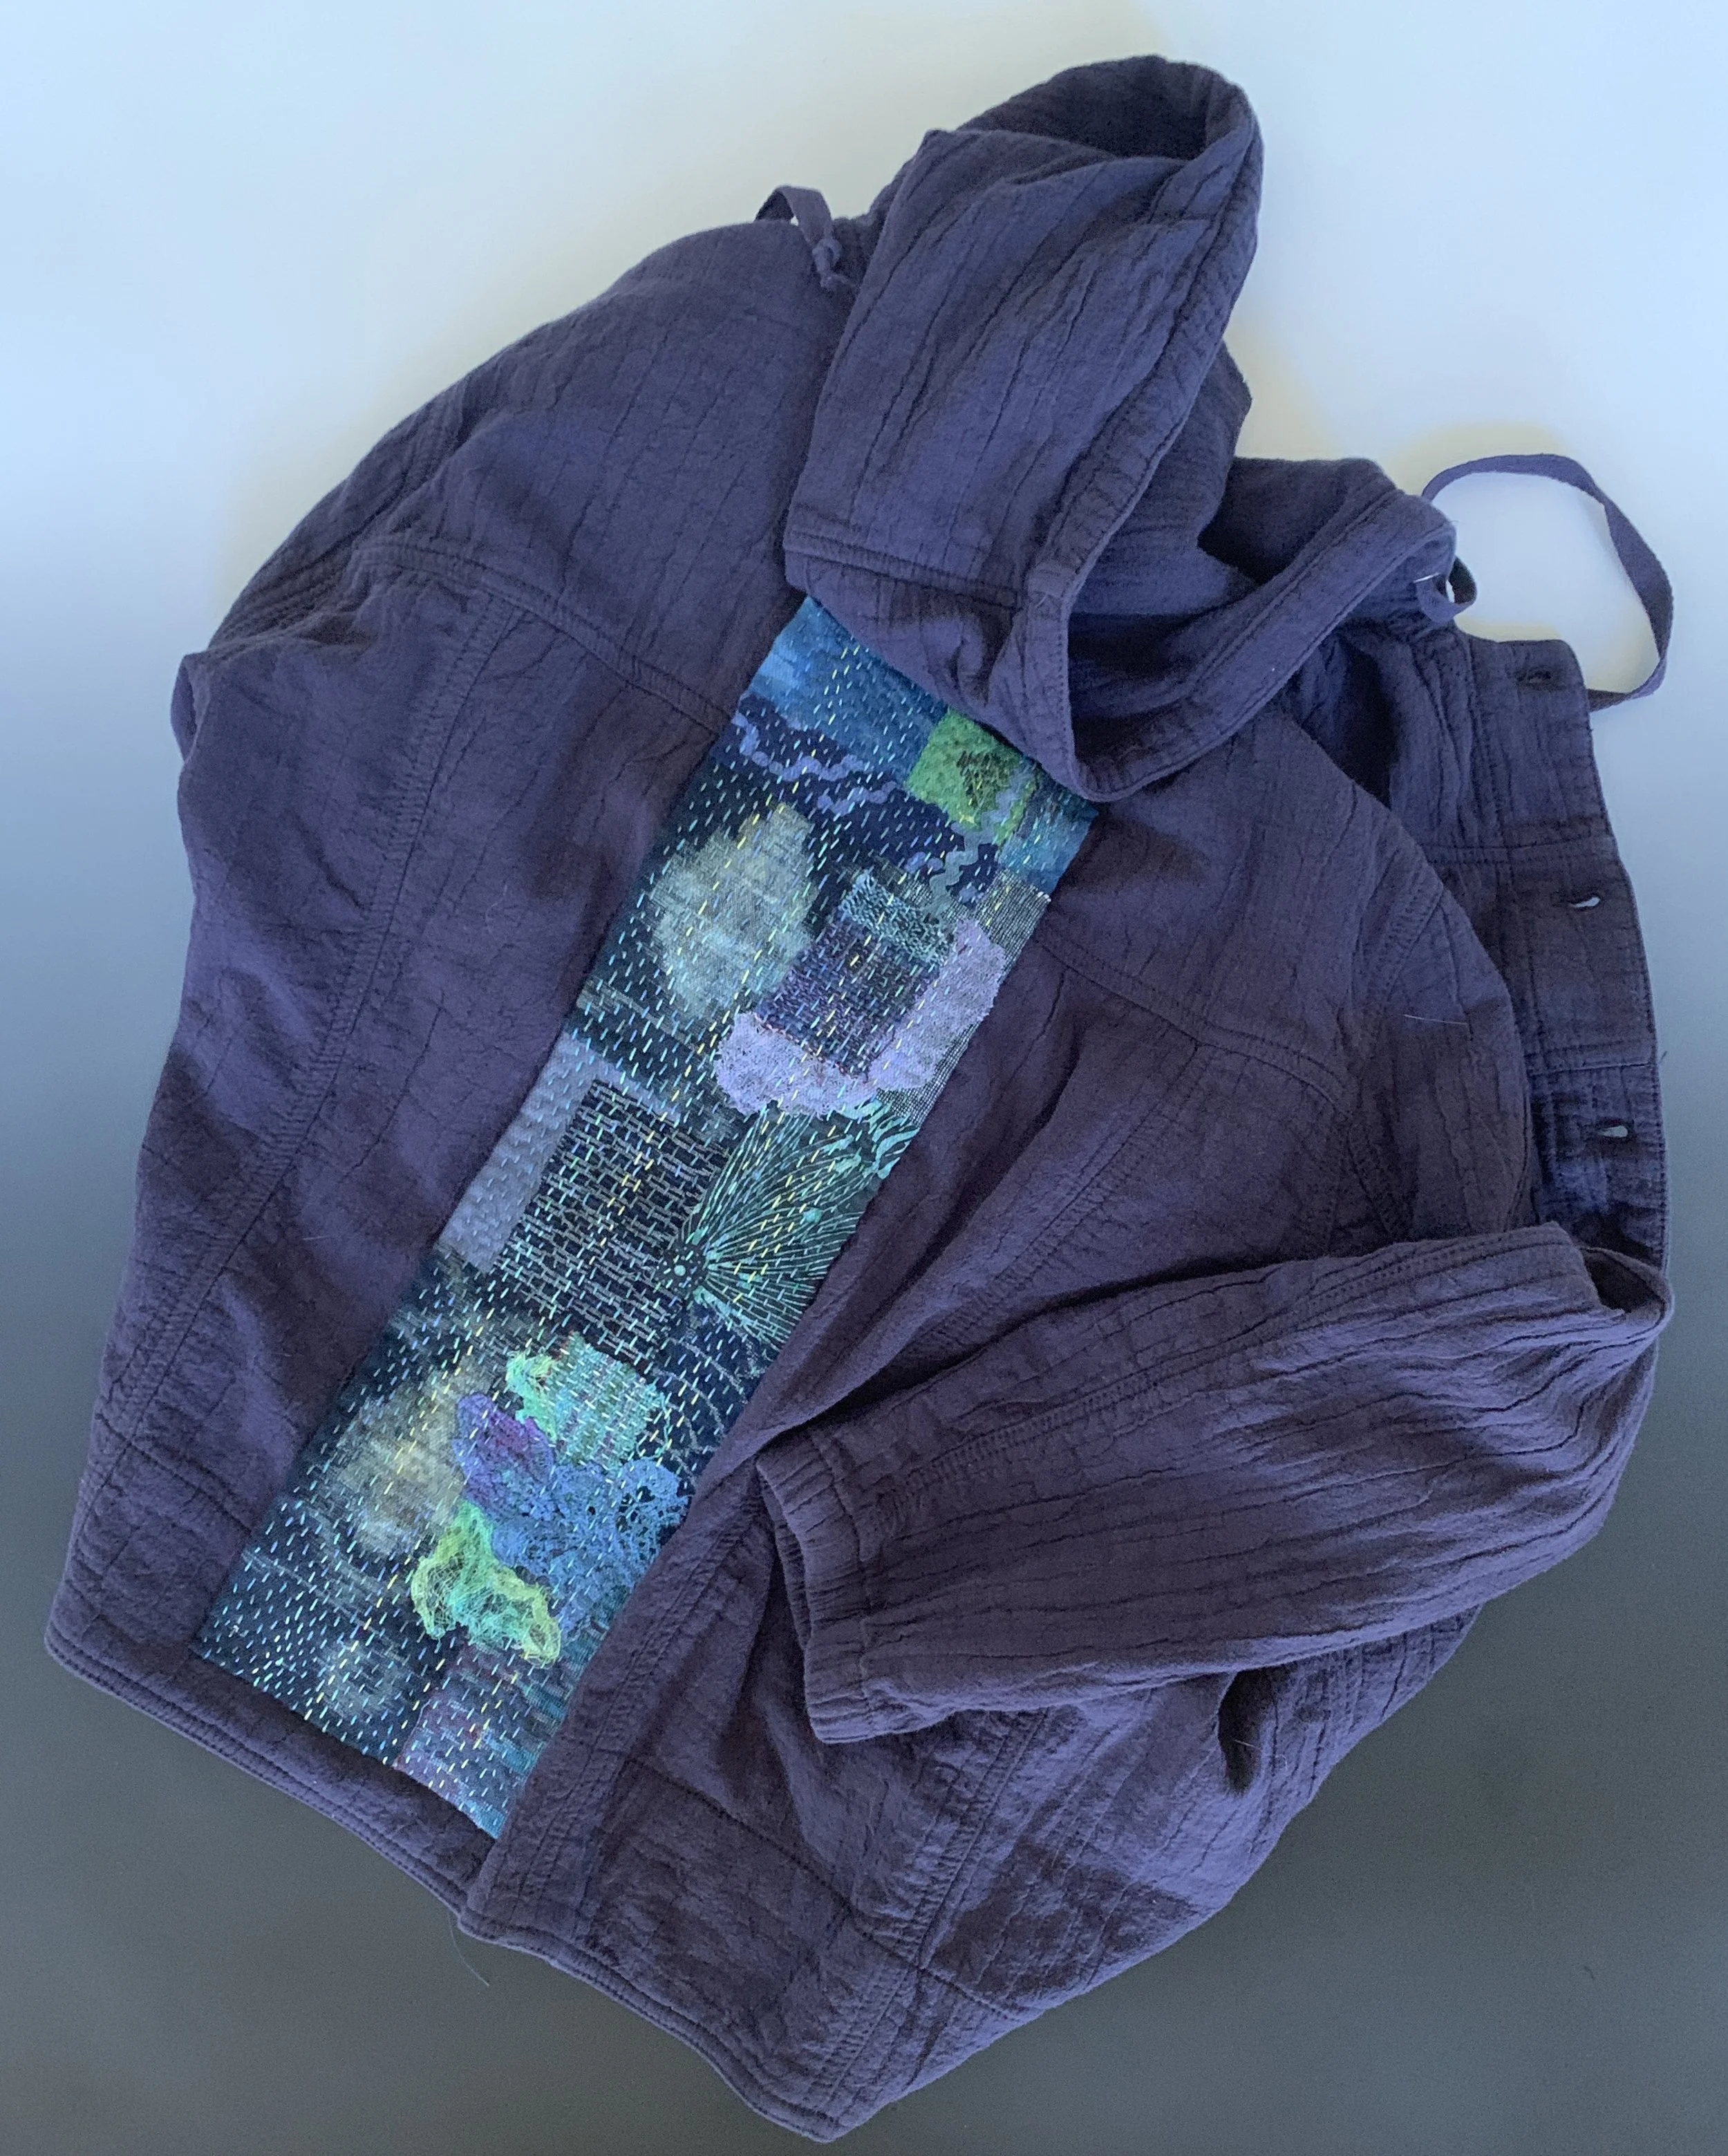
Sashiko Hoodie
Sashiko with Handwovens
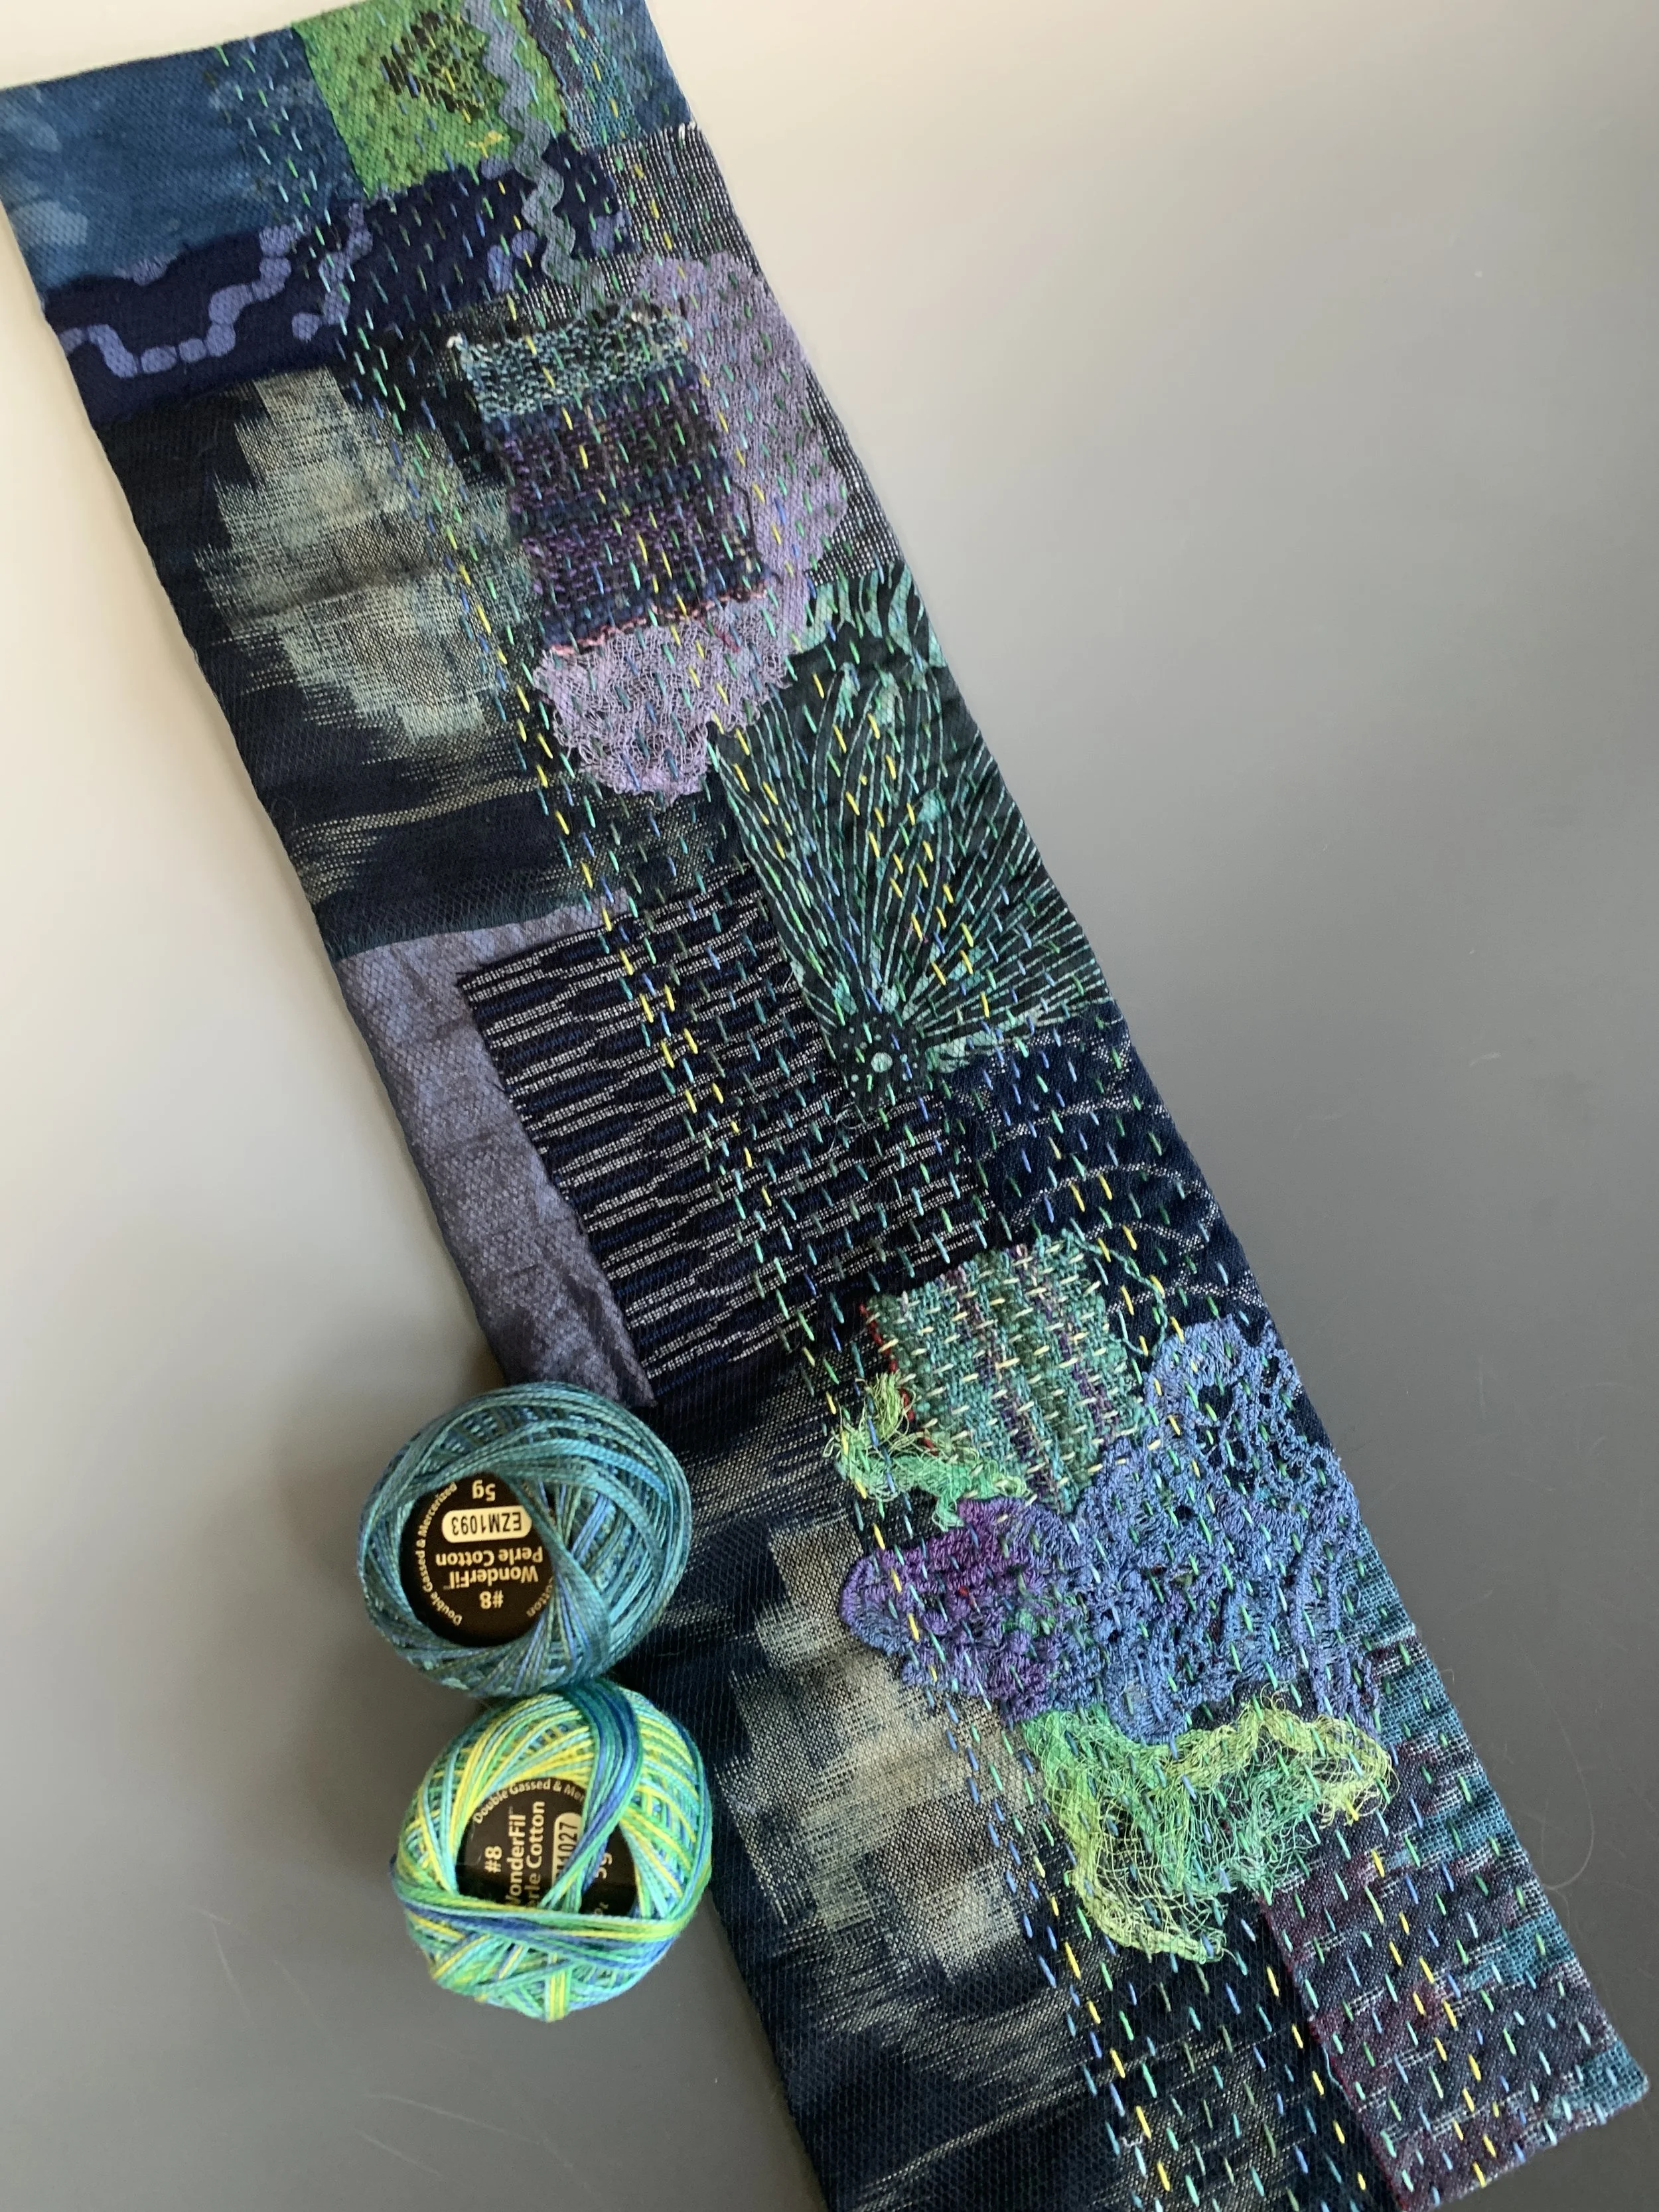
Ice-dyed fabric, handwoven scraps, and sari silks became part of my next Sashiko patch. There is some wabi-sabi nature to it. As some of my handwoven is above the tulle, but most is underneath. The sari silk was used at the borders and created a little differential draw-in after stitching.
There are over 100 patterns of Sashiko patterns. I have incorporated a variation of “Steps and Weaves” or Dan tsunagi (linked steps) on top of my handwoven remnants. Plain weave cloth makes it easy to see a pattern grid when stitching free form. When continual steps are repeated and spaces are filled, a pattern called “Yamagata” or mountain steps is created. This is my variation or version of it.
Progress of Sashiko Stitching with additional handwoven
Of course I also became interested in using in nuno felting to further stabilize the cloth as well as add to the design element.
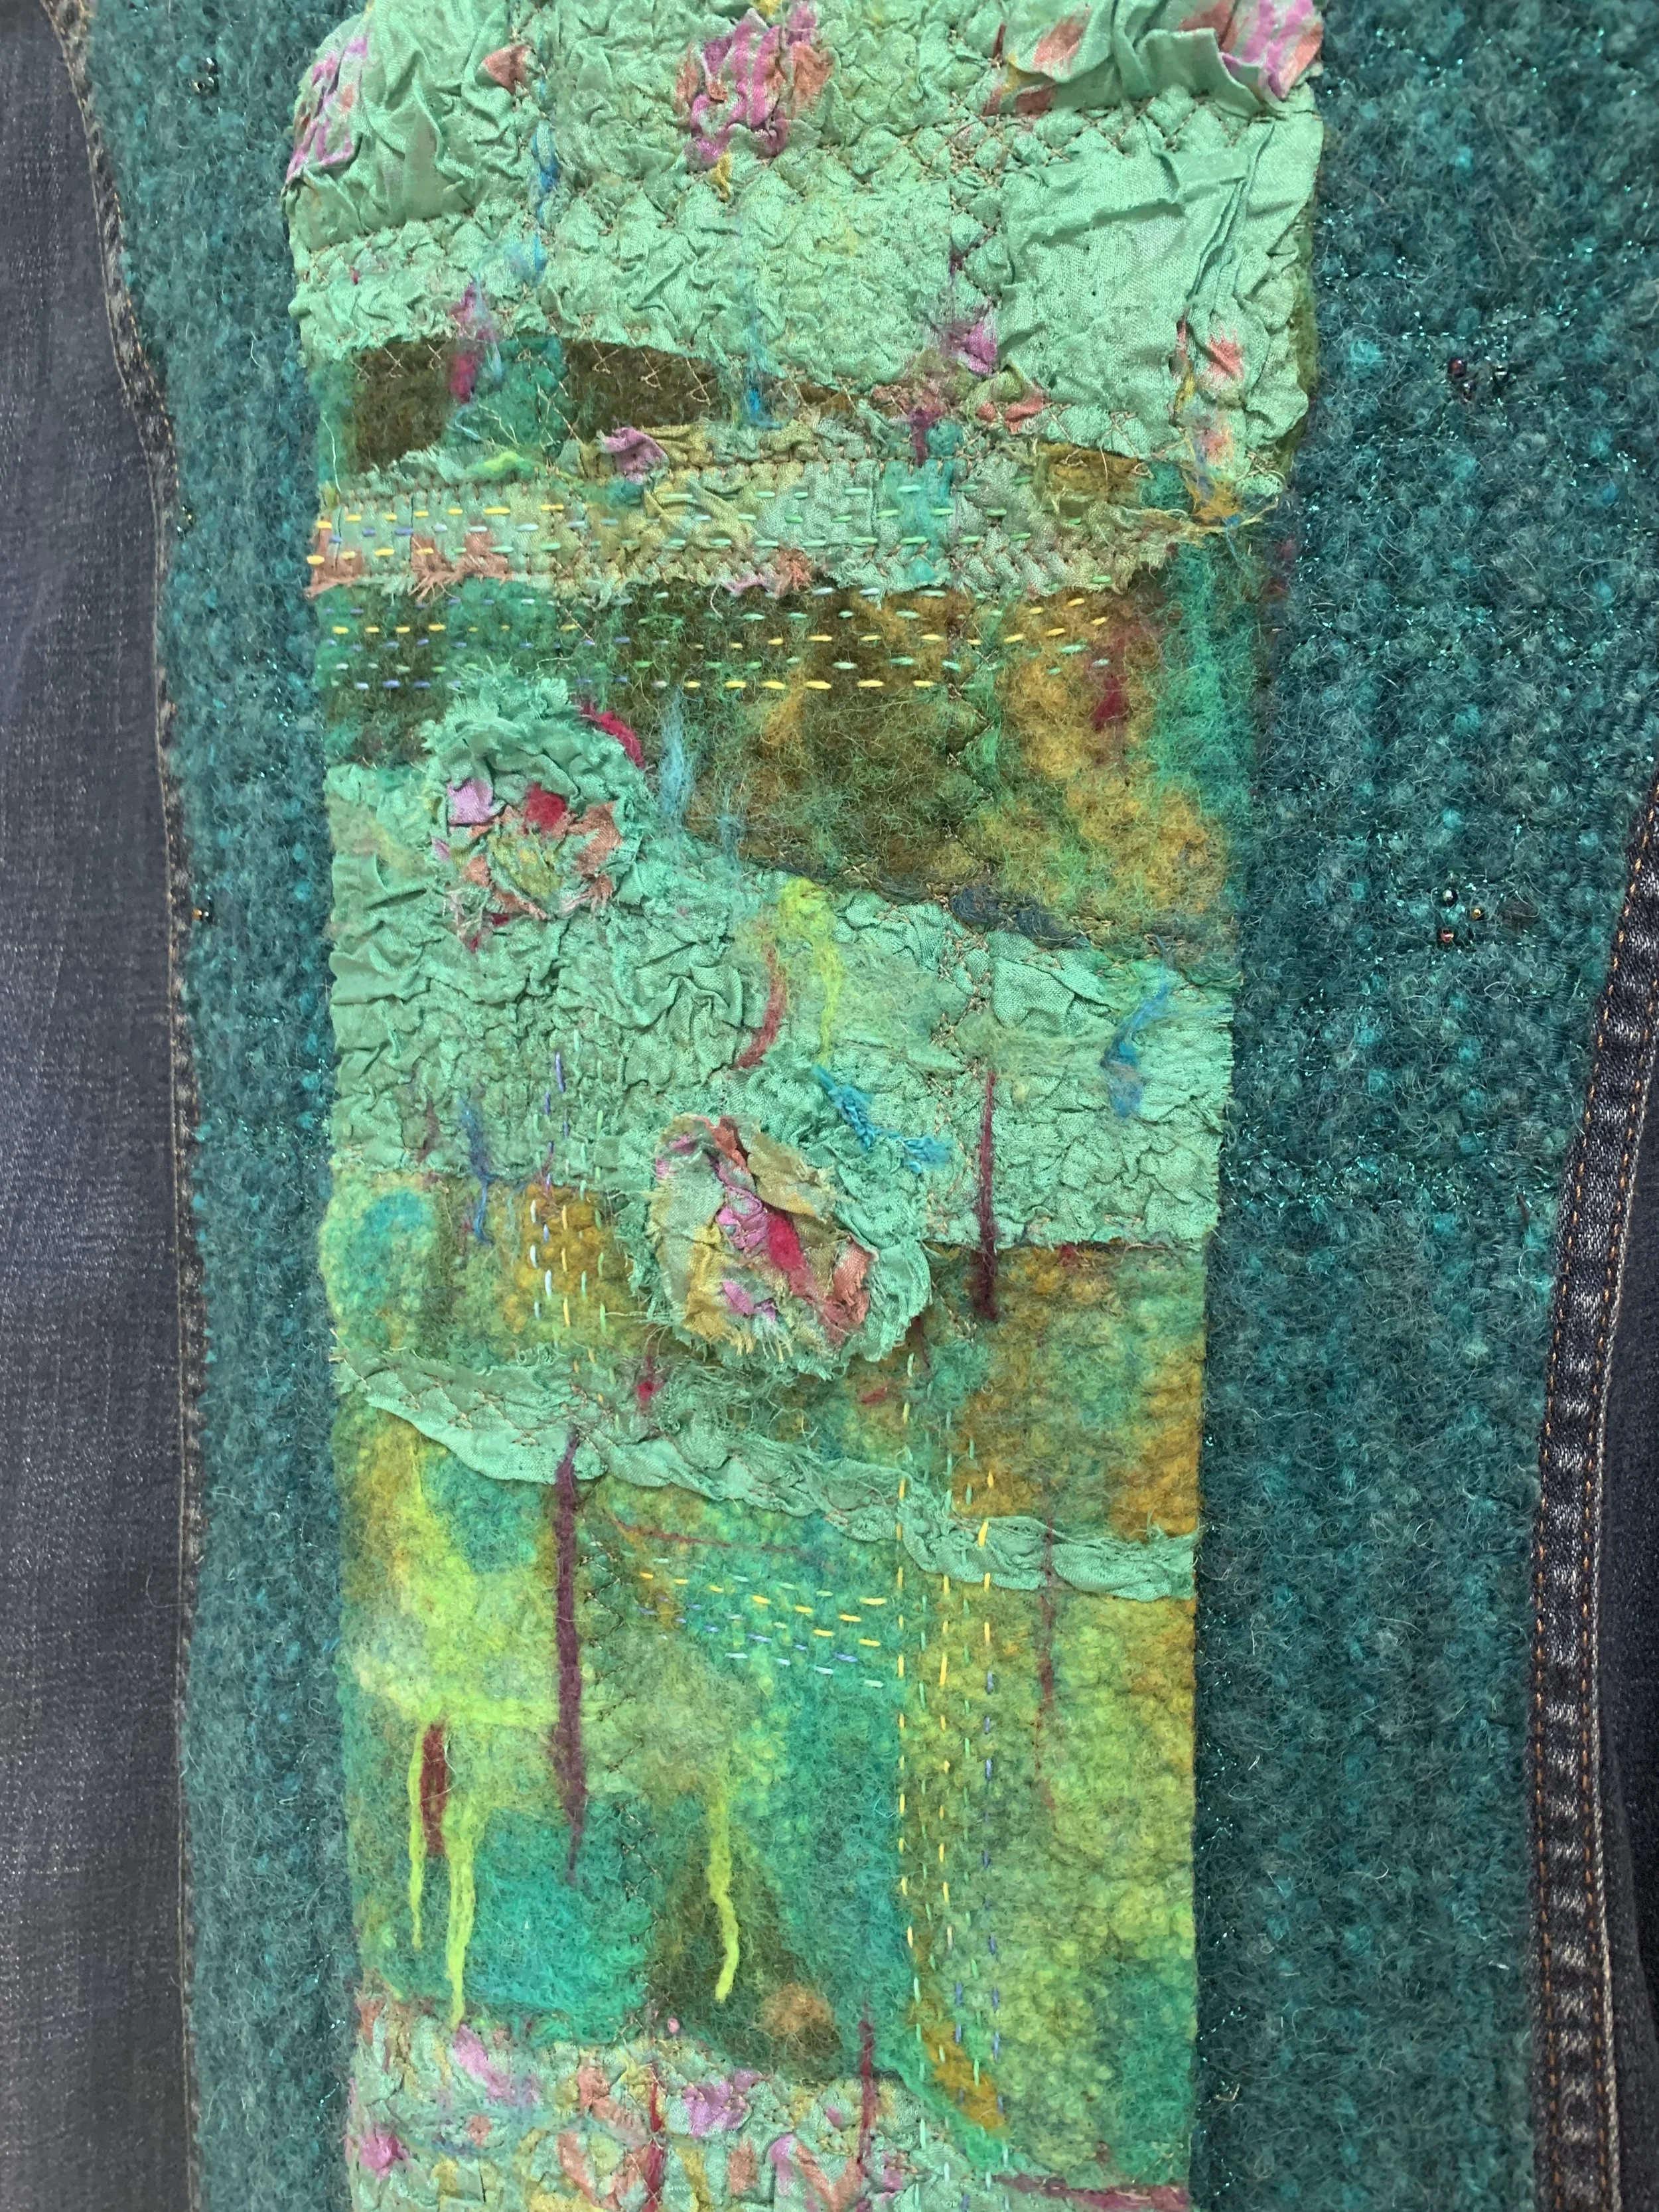
Close-up of Sashiko on NunoFelting Collage
Another piece I decided to Sashiko stitch was an indigo moon fabric collage. It uses some fabric I collected from Cape Cod Shibori in addition to my own ice-dyed and indigo natural dyed deflected doubleweave handwoven. The indigo natural dyed comes from Ricketts Indigo and was naturally dyed by Shiny Dime fibers. Both artists sell the seeds if you are interested in growing your own. I have also dyed the cheesecloth representing some clouds. I may later Sashiko stitch those as well.
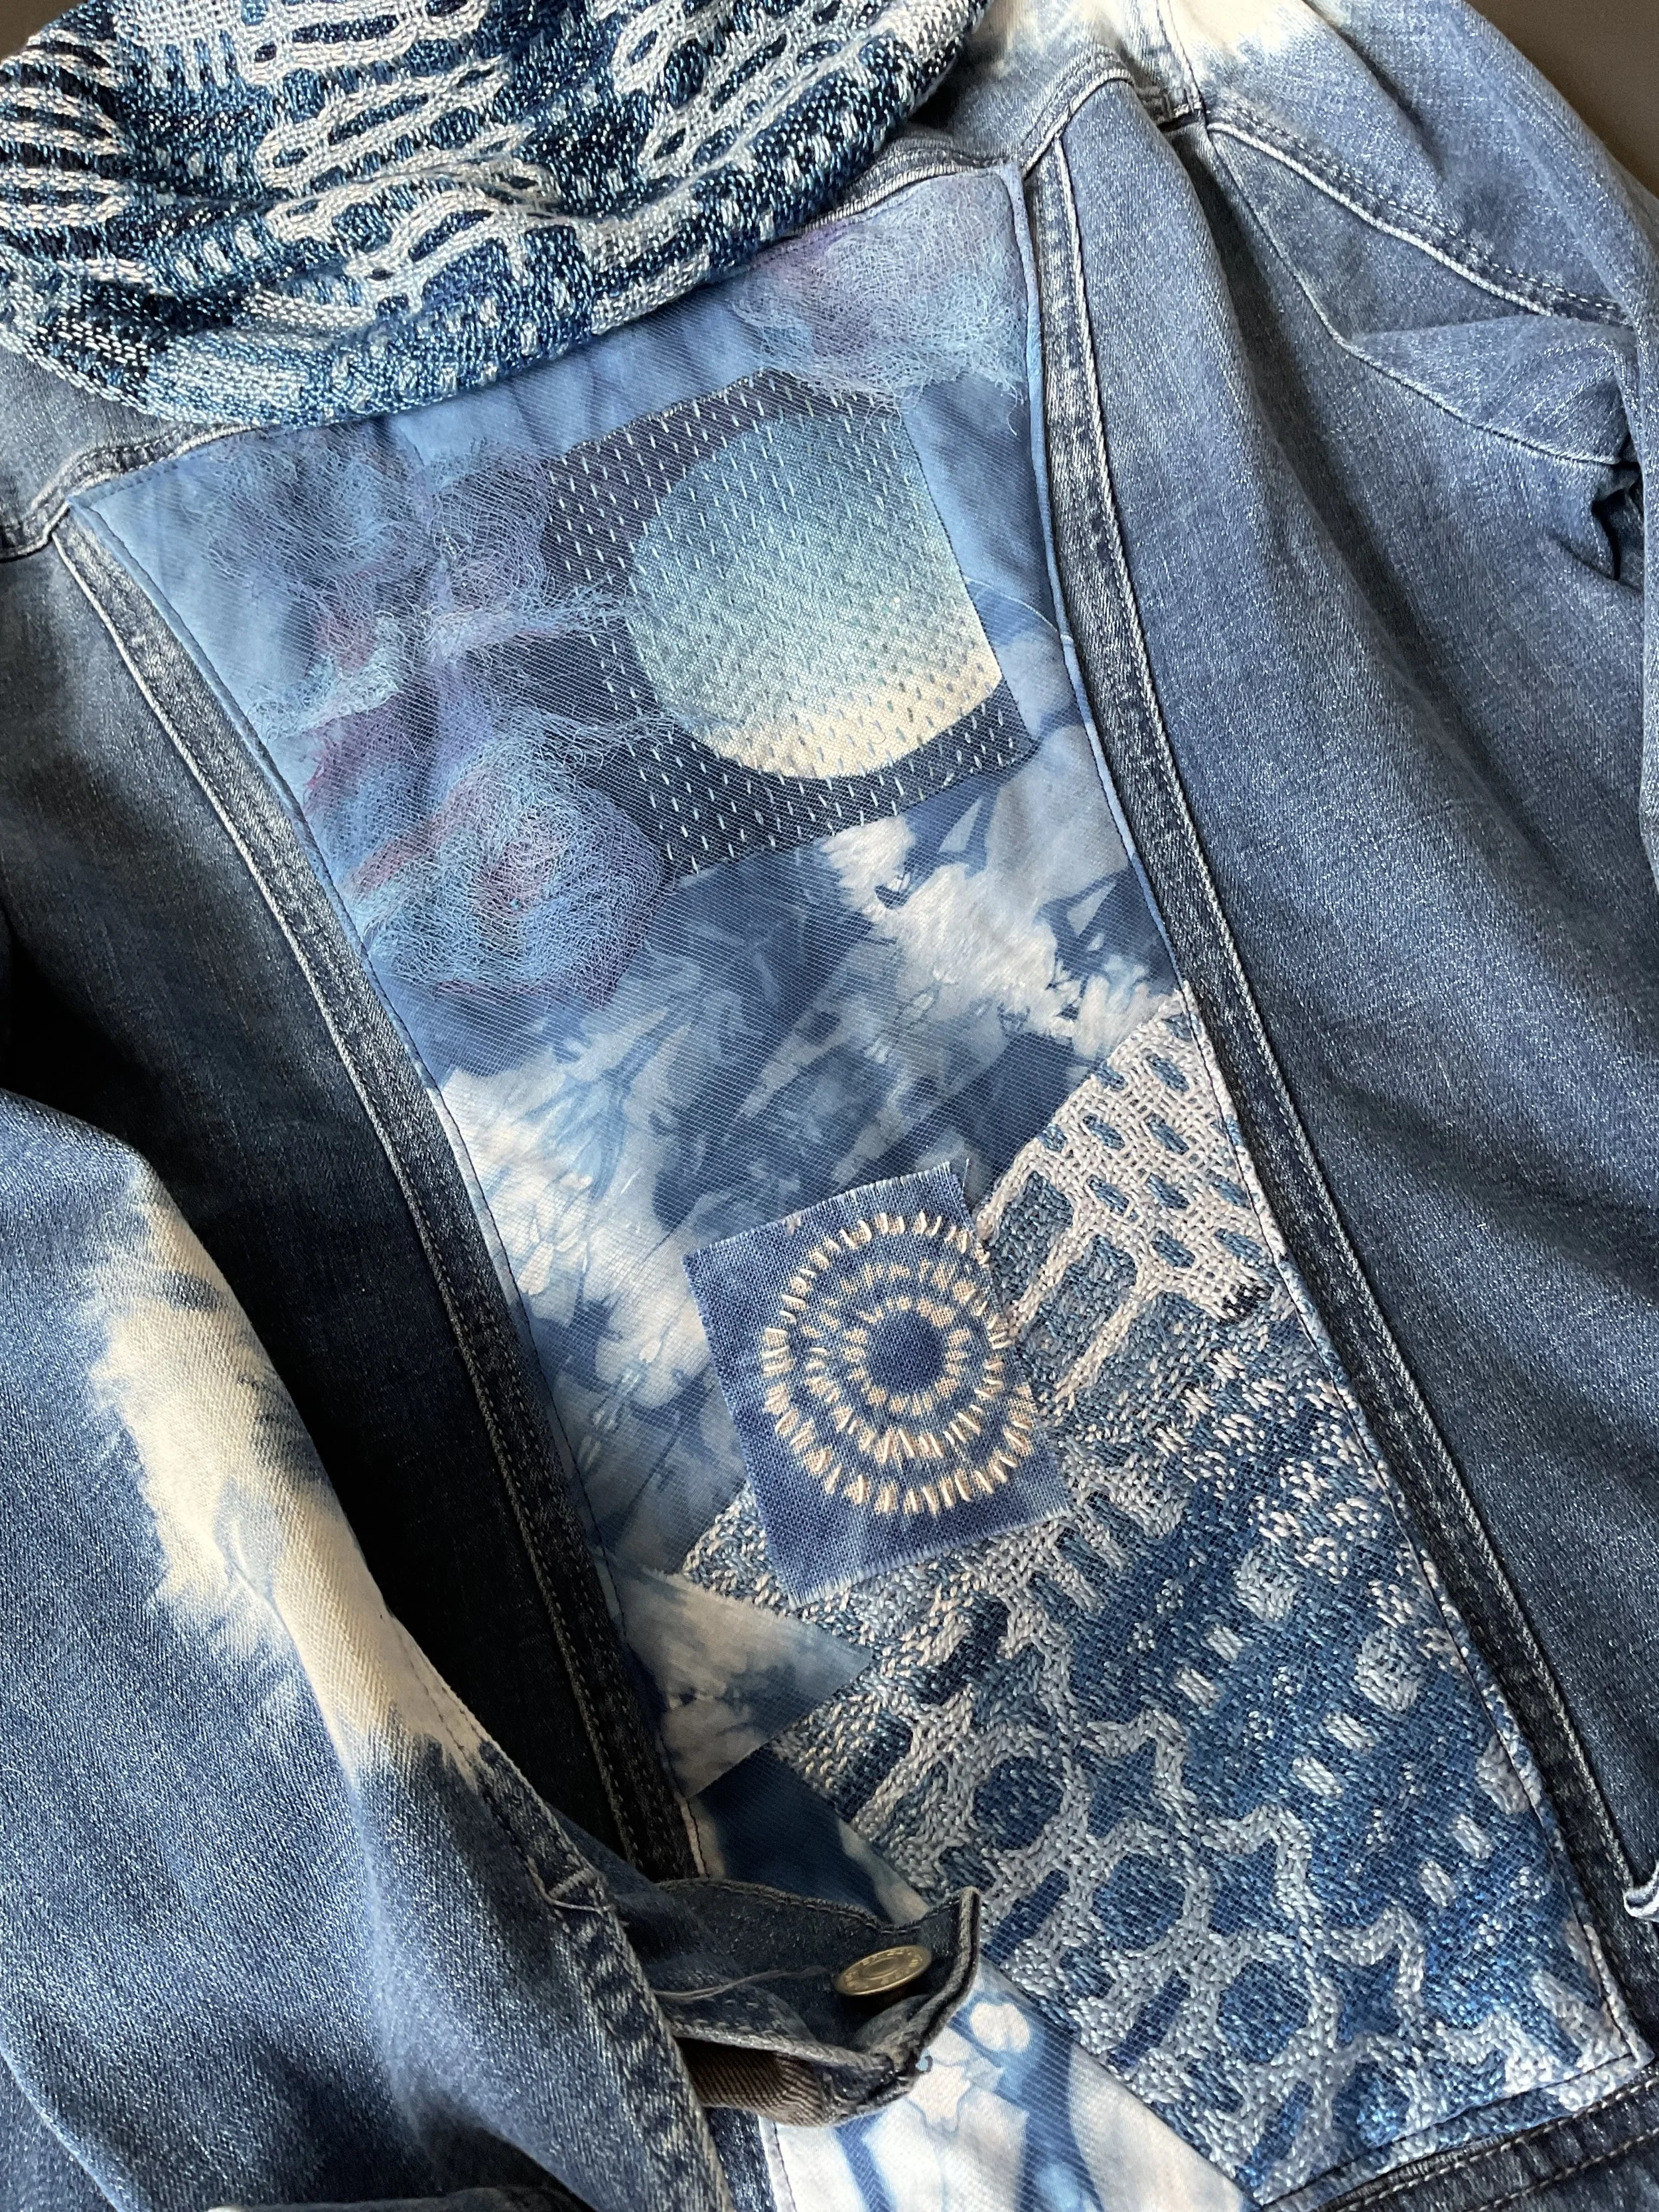
Indigo Moon Deflected Doubleweave
It can be helpful to draw more intricate designs on graph paper. Another useful tool is the Sashiko Pattern Generator by Forest O and Beth Ross Johnson. The pattern generator can be used for Sashiko Ori (Weaving). I have used the pattern generator to create “steps and stairs” to explore how it works. As mentioned, it is designed for weaving.
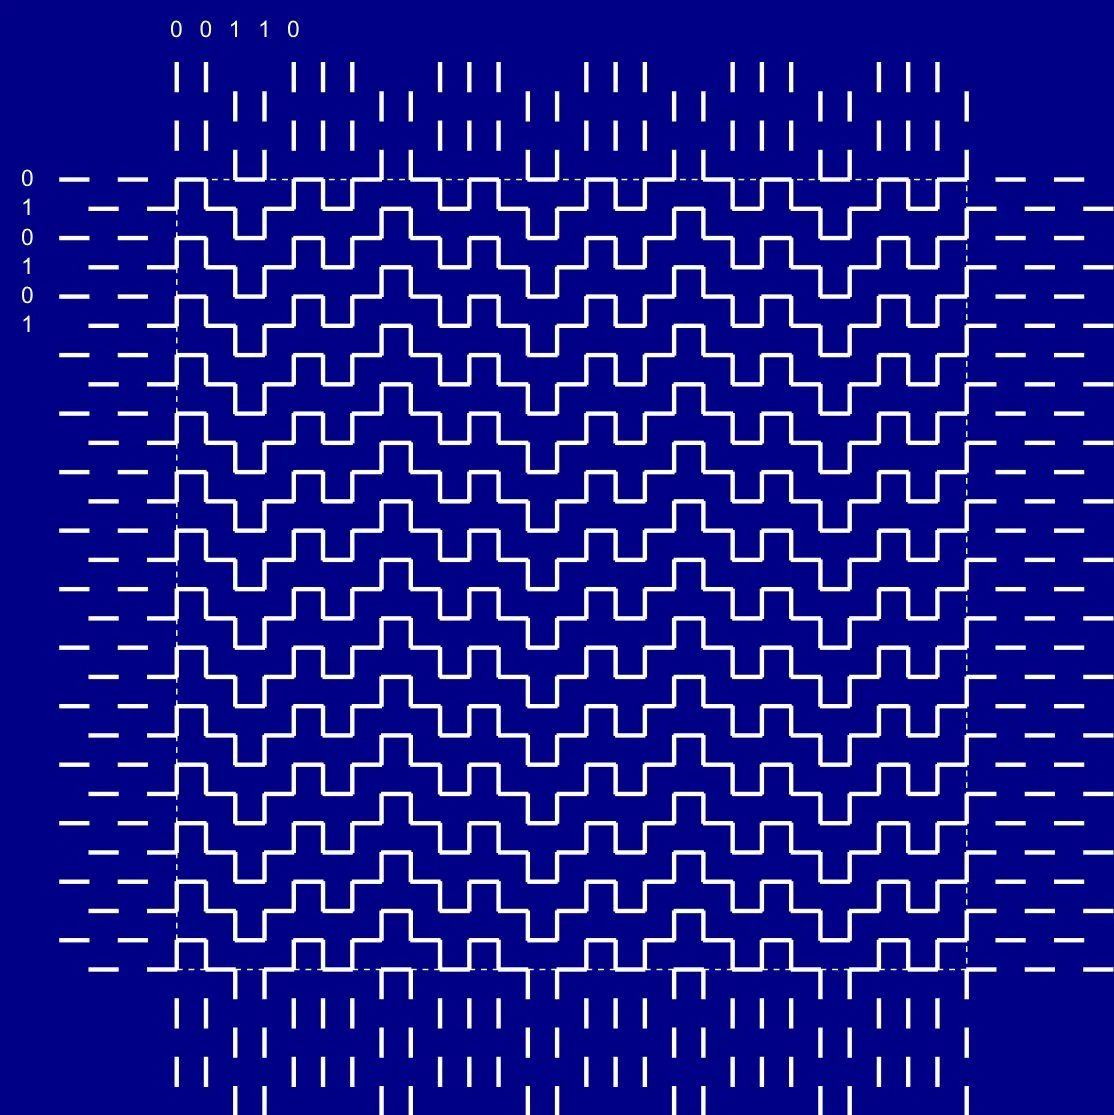
Pattern Generator Example
Sashiko stitching is fun and easy to do! As with any other handcraft, it does get easier. As mentioned, it is really easy to stitch handwovens , particularly plain weave. Here is an example where I stitched into plain weave while on the loom. The plain weave in the fabric can be used to keep your stitches equally spaced apart.
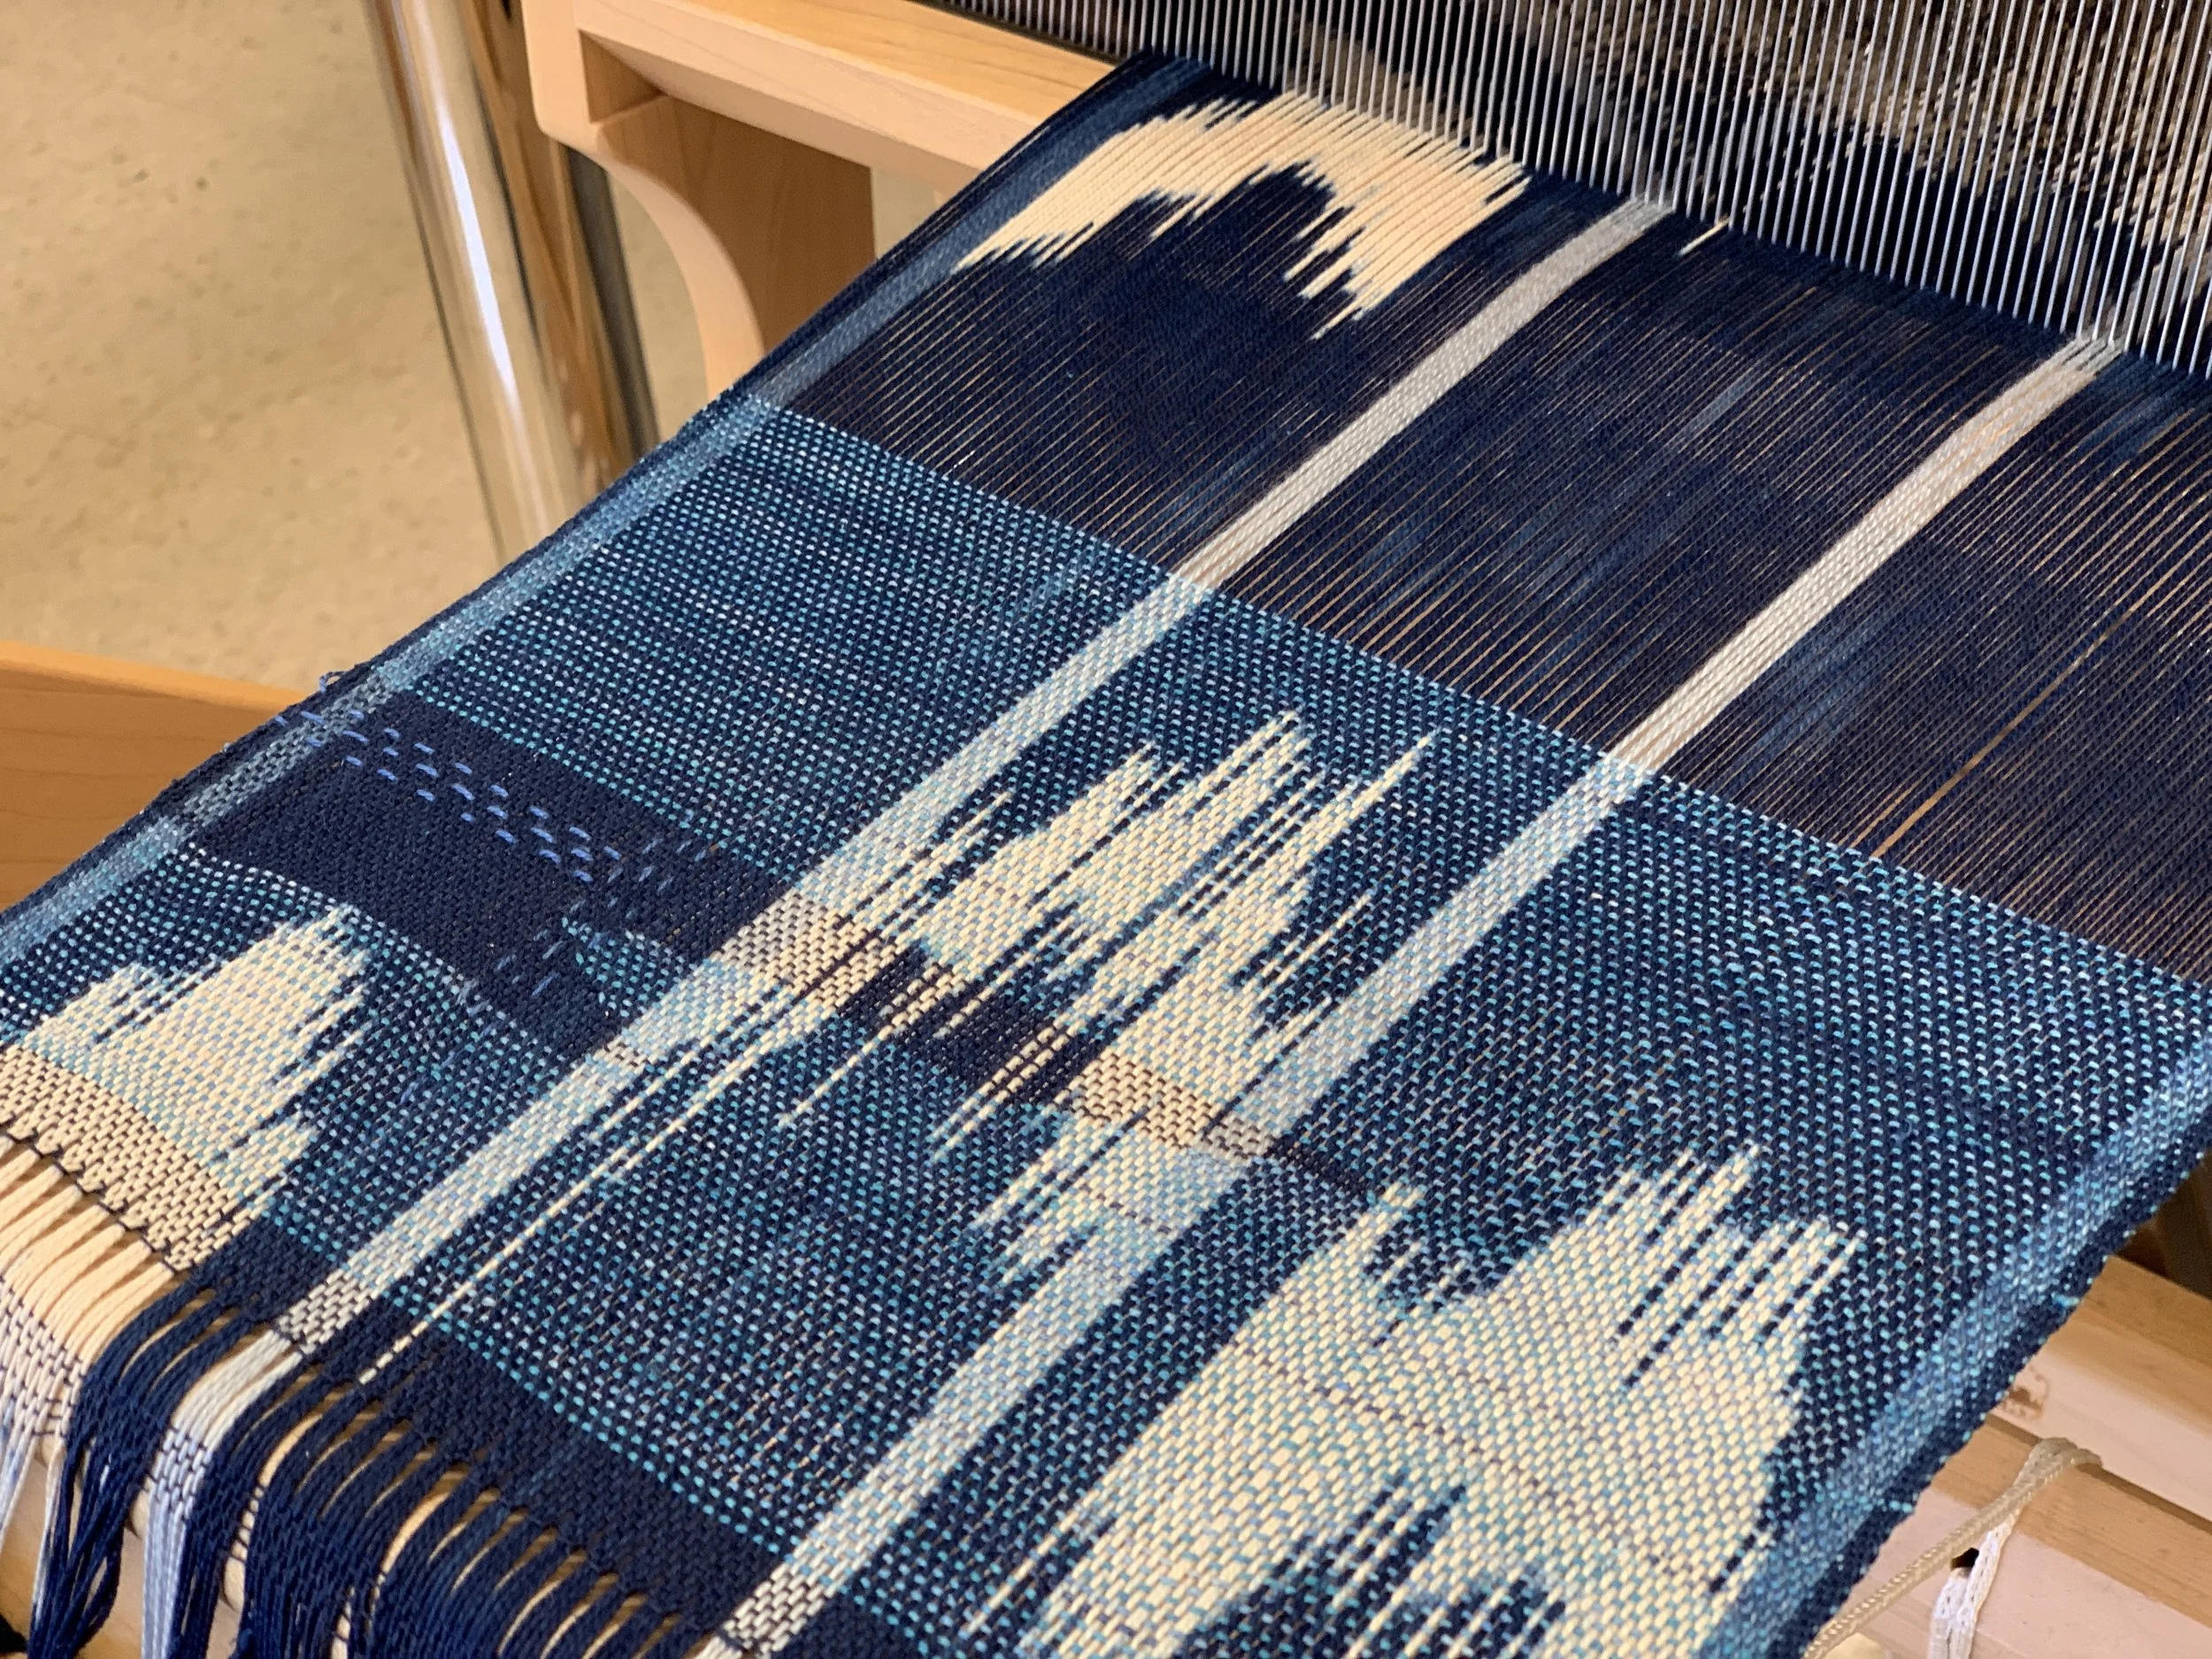
Sashiko sample stitched on loom (left)